Git
Dreamflow supports Git integration, allowing you to connect your projects directly to GitHub, GitLab, or other Git providers.
Git integration is only available for users on the Pro plan and above.
Connect Repository
You can connect a repository in two main ways:
-
Clone Codebase: Use this option when you want to start a new project from an existing Flutter app.
-
Connect Project to Git: Use this option when you already have a project in Dreamflow and want to link it to a Git repository.
Currently, Dreamflow does not support multi-user collaboration within the same repository. If multiple Dreamflow projects attempt to use the same repo, the system will detect and restrict it.
For team collaboration, please reach out regarding the Enterprise Plan.
Clone Codebase
To clone a codebase:
- Go to the Dreamflow Dashboard and select Clone Codebase.
- In the dialog box, enter the following details:
- Project Name – Choose a name for your Dreamflow project.
- Repository URL – Paste the HTTPS URL of your Git repository (e.g.,
https://github.com/username/repo.git). - Access Token – Enter your personal access token. Refer to the Get Access Token for more information on how to generate one.
- Once all fields are filled in, click Clone Repository.
Dreamflow will then clone the repository, import your Flutter project files, and automatically open it in your workspace for editing.
Here’s an example of cloning a repository from GitHub:
Dreamflow currently supports Flutter repositories only. If your repository contains non-Flutter code or multiple projects (like a monorepo), the import may fail.
Support for monorepos is planned for a future update.
Project Import Requirements
When importing an existing repo into Dreamflow, Dreamflow expects:
- Flutter app: Dreamflow checks for a
pubspec.yamlfile. If not found, import fails because the repository is not recognized as a Flutter project.- Monorepos - repositories containing multiple nested Flutter projects - aren’t supported yet, but support is on our roadmap.
- Web Support: Dreamflow requires apps to run in the web preview environment. Repos using packages that break web may fail to load or run incorrectly.
- The Dreamflow preview uses Flutter's canvaskit renderer. If the project specifically uses the HTML renderer setting, the preview may not load
There are a few other things that might go wrong when importing an existing Flutter repo:
- Unsupported Flutter Version: If the project uses a Flutter version Dreamflow does not support, import will fail with an error. There are also cases where implicit version ranges cause analyzer issues due to breaking Flutter changes.
- Theme Issues : Certain theme configurations might not render properly in the Dreamflow editor - you may not see all of your colors or text styles in the Theme panel.
- Local Servers / Background Processes: Projects requiring local API servers or background processes during development will fail to run inside Dreamflow.
- Private Dependencies: If the project depends on packages hosted in private servers that Dreamflow cannot access, the import will fail.
- Code Generation Tools (build_runner, freezed, flutter_localizations): You cannot currently execute scripts inside of the Dreamflow builder. If the imported project depends on code generation, you will need to generate Dart files outside of Dreamflow and commit them to the repo.
-dart-defineRequirements: You must provide a default configuration so the app can run without requiring any --dart-define parameters.- Project May Be Too Large: Very large repositories may take a long time to start and you may see some performance degradation in the Dreamflow builder.
Connect Project to Git
To connect a Dreamflow project to Git repo:
- Open your existing project in Dreamflow. Go to the Source Control Panel on the left sidebar and click Connect Repository.
- In the dialog, provide:
- Repository URL – Paste the HTTPS URL of your new blank repository. If you haven’t already created one, you can create a new repository on your Git provider (such as GitHub) before proceeding.
- Access Token – Enter your personal Git access token. Refer to the Get Access Token for more information on how to generate one.
- Click Connect.
Once connected, Dreamflow will automatically start tracking file changes, which you can view in the Changes list.
The repository must be blank or contain only a README and/or LICENSE file.
Here’s an example of connecting a project to a repository hosted on GitHub:
Get Access Token
To connect with your Git provider, you’ll need to generate a Personal Access Token (PAT). This token allows Dreamflow to authenticate and securely interact with your repository.
For GitHub
Follow these official GitHub guides to create a Personal Access Token:
- Managing your personal access tokens
- Creating a fine-grained personal access token
- Creating a classic personal access token
Required Scopes for Dreamflow:
- For Fine-grained tokens: Grant Content: Read & Write access to the specific repository you plan to use.
- For Classic tokens: Enable repo and workflow permissions.
When creating a fine-grained Personal Access Token for an organization-owned repository, the token may require admin approval before it becomes active. Until the token is approved, Dreamflow may return a 403 error. After the approval, you can retry the connection and it should succeed.
For GitLab
You can generate a Personal Access Token directly from your GitLab account by following the official documentation:
Required Scopes for Dreamflow:
api: Full API access.read_repositoryandwrite_repositoryto read and write code to your repository.
Once your token is created, copy it and paste it into the Access Token field when connecting your repository in Dreamflow.
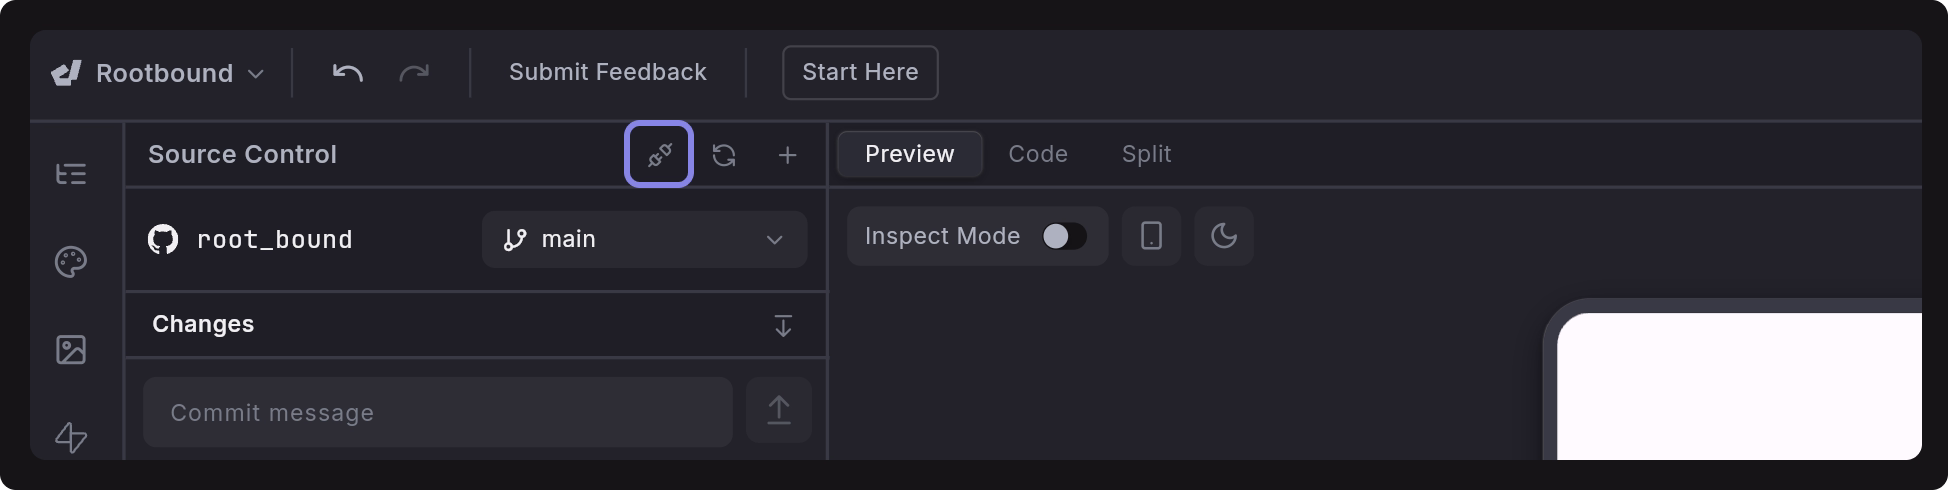
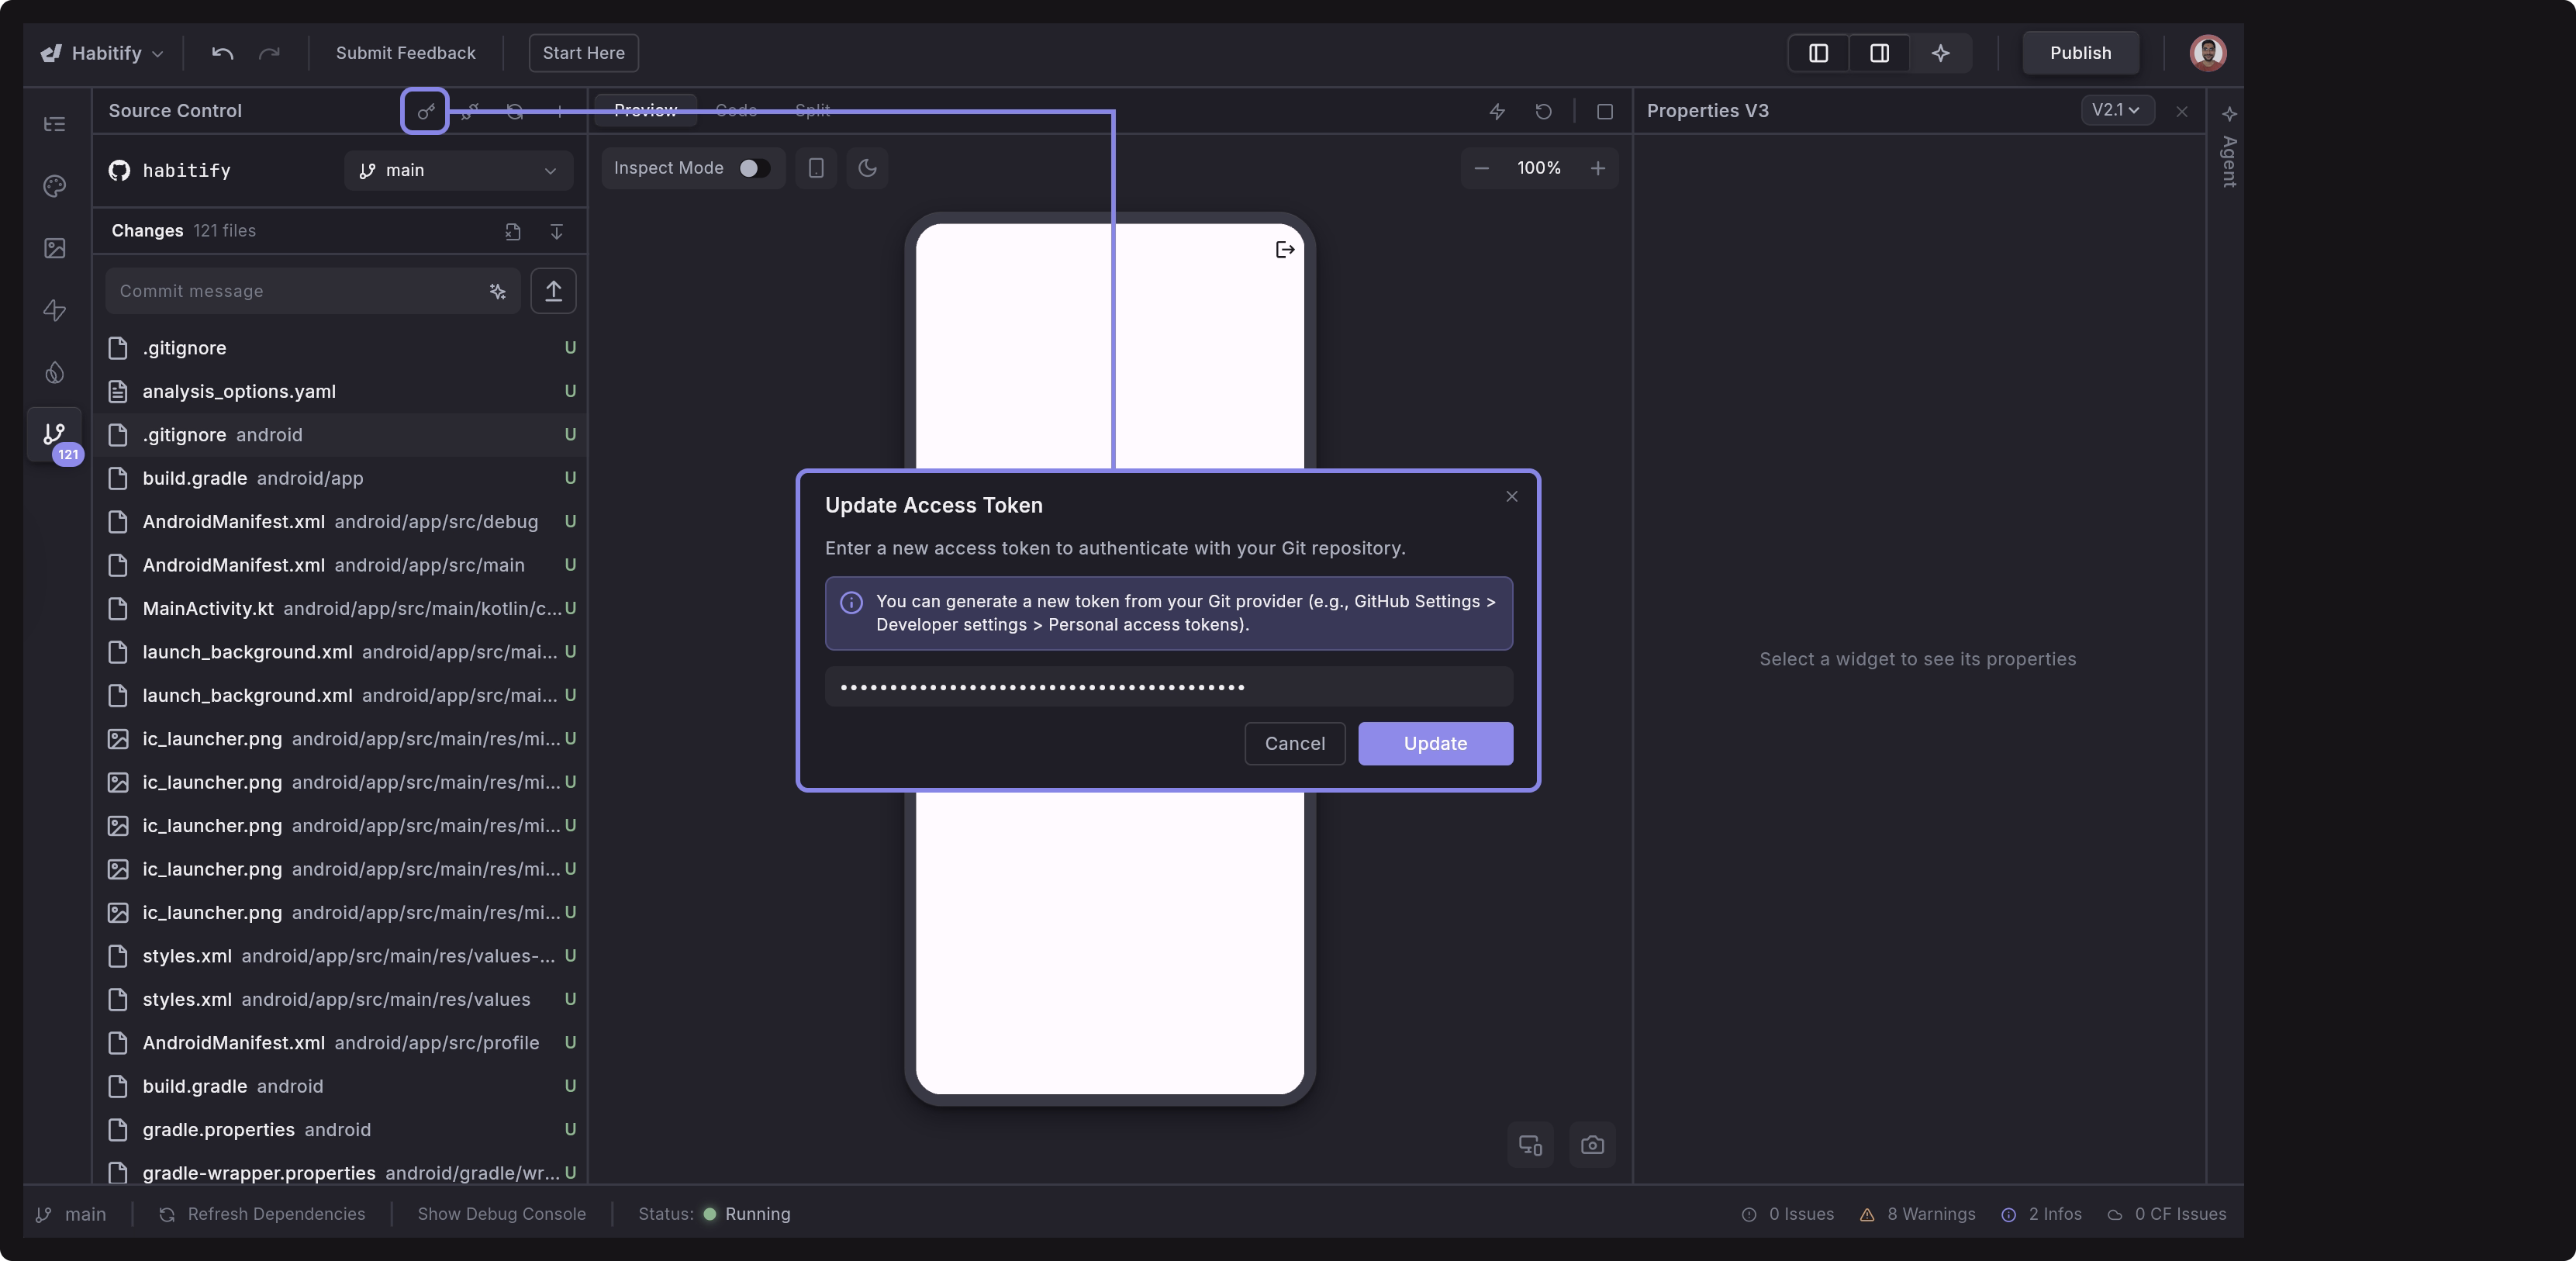
In Dreamflow, you can update the access token later at any time by clicking the key icon in the Source Control panel and entering a new Personal Access Token.
Git Operations
This section walks you through how to perform common Git operations like branching, committing, and syncing your code.
Branching
You can easily manage branches directly within the platform, i.e., create new ones, switch between existing ones, and refresh your branch list when needed.
Create a New Branch
You can create a new branch to work on a specific feature or fix without affecting the main branch.
To create a new branch:
- Open the branch dropdown in the Source Control panel and choose the branch you want to create your new branch from (e.g.,
main). - Click the + button on the right side of the panel.
- In the dialog, enter a name for your new branch (for example,
feature/user-profile). - Click Save.
Once created, Dreamflow will automatically switch your workspace to the new branch.
View and Switch Branches
You can view all available branches in the dropdown menu in the Source Control panel. To switch branches, simply open the dropdown and select the branch you want to work on.

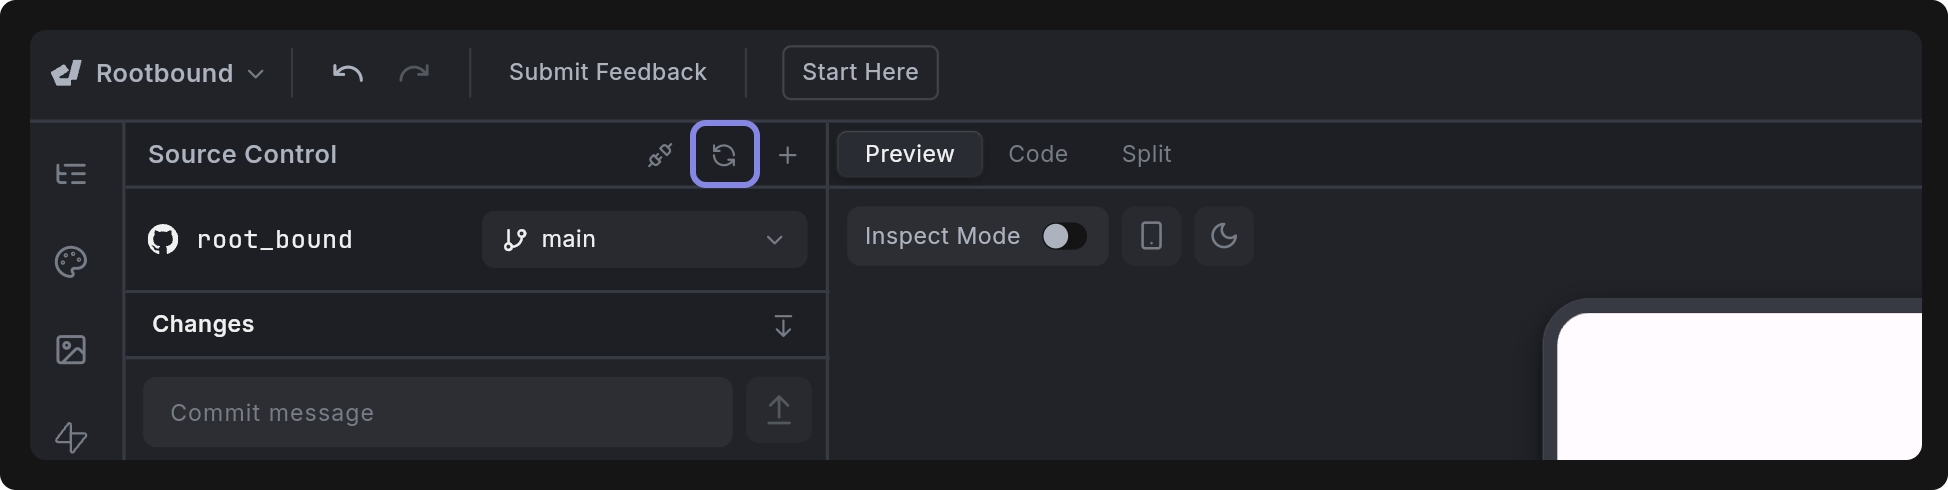
Refresh Branch List
If you’ve created or deleted branches outside of Dreamflow, click the Refresh Branches icon beside the dropdown. This updates your local list so you always see the latest branches available in your remote repository.
Push Changes
To push changes from your project to the remote repository:
- Make edits to your app.
- Check Source Control > Changes. The modified file will be tagged M and listed there.
- (Optional) Click View Diff to compare your edit with the previous version.
- Use AI to automatically generate a Commit Message, or enter your own message to describe what has changed.
- Click the Push icon to commit and push the update to your connected repository.
Revert Changes
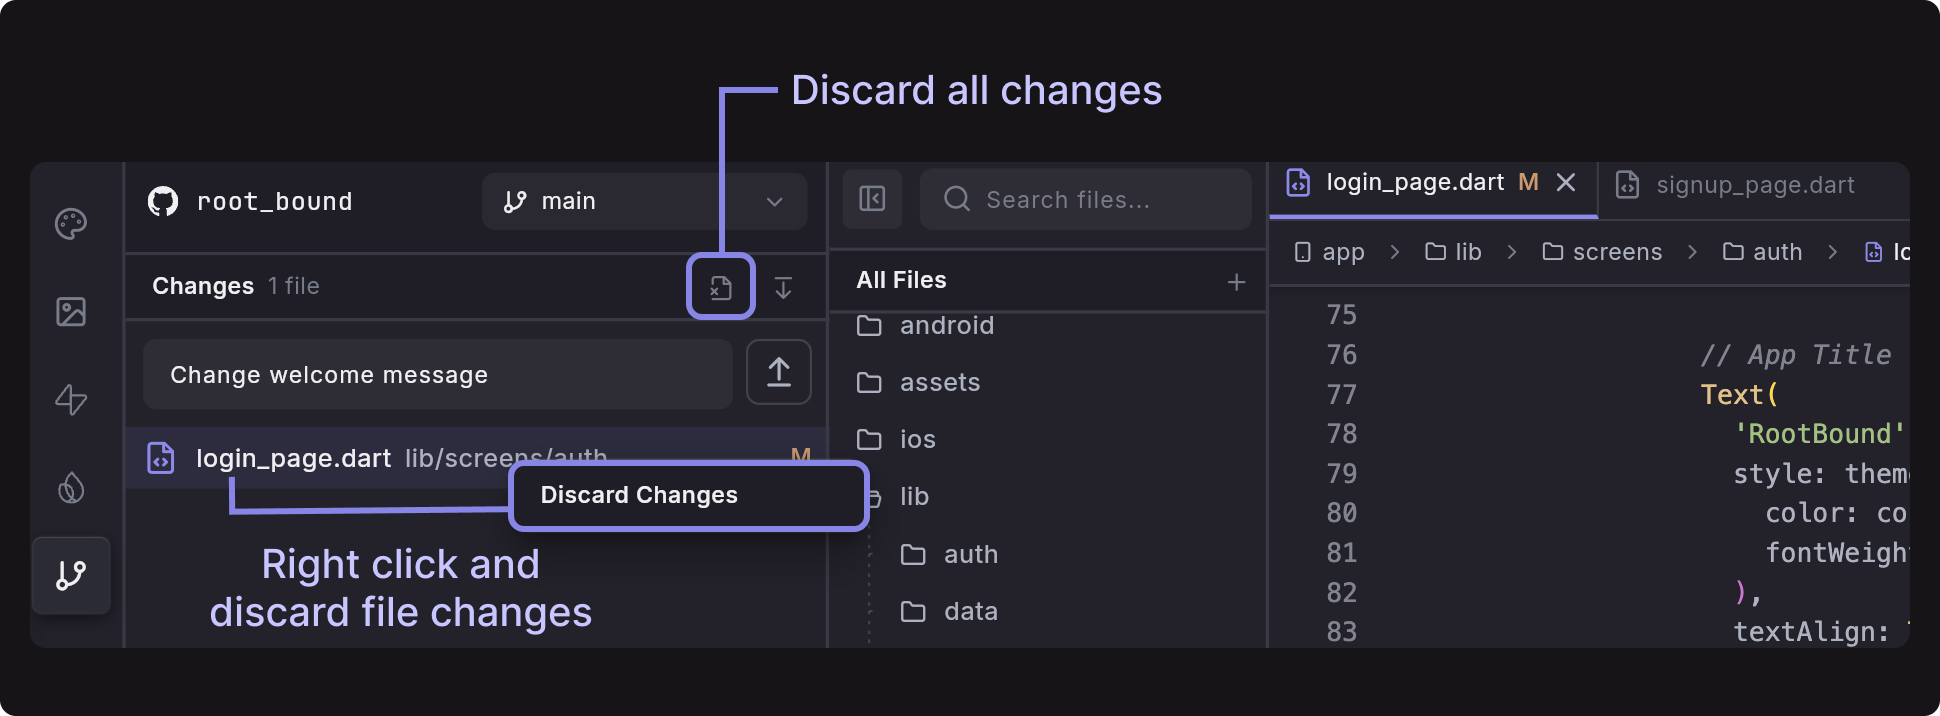
If you want to undo changes before pushing them, you can revert individual files or all changes at once.
- To revert a specific file, right-click on it and select Discard Changes.
- To discard all pending changes, click the discard icon on the right side of the Source Control panel.
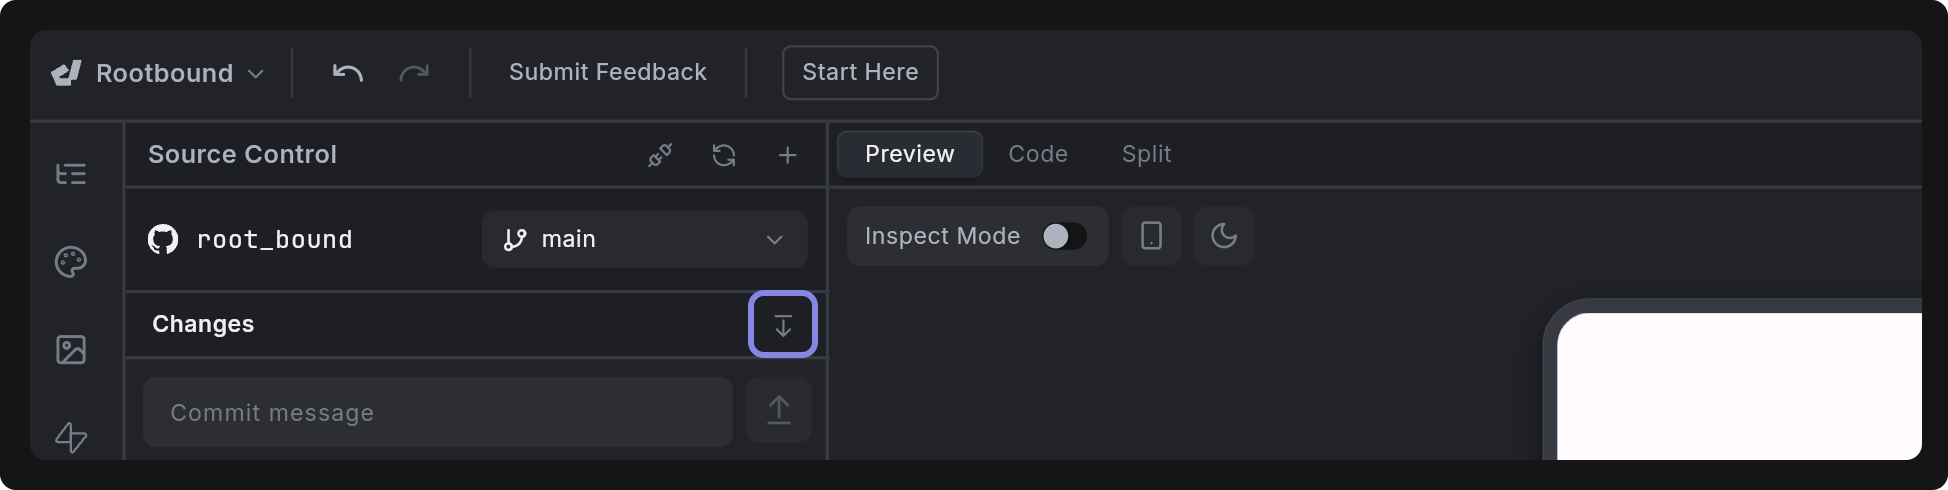
Pull Changes
To update your project with the latest code from the remote repository, click the pull icon in the Source Control panel. Dreamflow will fetch and merge any new commits from your remote branch.
Resolve Conflicts
When you have conflicts, files are marked with a red ! icon in the Changes list. To resolve conflict:
- Open the file and review the differences.
- You’ll see both versions side by side:
- Incoming changes from remote (from the repository)
- Your existing changes (your local edits)
- Choose whether to Accept Existing, Accept Incoming, Accept Both, or resolve the conflict manually.
- Once resolved, save the file, commit and push again to sync your changes.
Disconnect Repository
If you want to unlink your project from a connected Git repository:
- Open the Source Control panel.
- Click the disconnect icon on the right side.
- Confirm the action when prompted.
Once disconnected, your project will no longer sync changes with the remote repository. Since you cannot connect a non-blank Git repo to an existing Dreamflow project, you will need to clone your repository into a new project if you would like to reconnect it to Dreamflow.