Apple App Store Deployment
Dreamflow allows you to deploy your apps directly to the Apple App Store from within the platform. This guide covers all the necessary prerequisites, a step-by-step deployment process, and common troubleshooting tips.
- Ensure you have set an app launcher icon.
- Create an Apple account.
- Purchase an Apple Developer membership. Learn more about the program and enrollment process here.
- Ensure your app bundle identifier is correct, as it cannot be changed after publishing. To update the bundle identifier, you can use the change_app_package_name package or simply ask the AI agent.
- It's recommended to test your app on a real device before deployment.
1. Create a Bundle Identifier
A Bundle Identifier (ID) is a unique string that identifies your app within the Apple ecosystem, typically formatted in reverse domain name notation like com.example.myapp.
To create a Bundle ID, visit the Certificates, IDs & Profiles page, add a new App ID, and provide these details:
- Bundle ID: Define any name in the reverse domain notation.
- Description: Add a brief description of your app.
- Capabilities: Select the necessary app capabilities. Ensure you select Push Notifications if your app uses them, and Sign In with Apple if your app includes that feature.
2. Add new app
App Store Connect is the platform used for submitting apps, managing app metadata, and much more. To add a new app, open the App Store Connect and then follow the official steps outlined here.
3. Add Apple App ID to Dreamflow
An App ID is used by Apple to identify your app and associate it with your development team.
To add your App ID in Dreamflow, open App Store Connect > My Apps, copy the Apple ID from the App Information section, then go to Dreamflow > Publish > iOS and paste it into the App Store App ID field.
4. Generate API key and add to Dreamflow
To generate your API Key, go to App Store Connect > Users and Access > Integrations > Team Keys. If you haven't added a key before, you will see a Request Access button. For further details, watch a demo here.
Generate a new API key by selecting Add (+), entering a name, and assigning the App Manager role. Once the key is generated, download it and upload it to Dreamflow > Publish > iOS > ASC Private Key (.p8).
5. Add issuer ID to Dreamflow
Copy the Issuer ID from App Store Connect by navigating to Users and Access > Integrations > Team Keys, and then paste it into Dreamflow > Publish > iOS > ASC Issuer ID.
6. Add Key ID to Dreamflow
Open the App Store Connect > Users and Access > Integrations > Team Keys. Find the row for the API Key you generated here, select Copy Key ID, and then paste it into Dreamflow > Publish > iOS > ASC Key ID.
7. Deploy
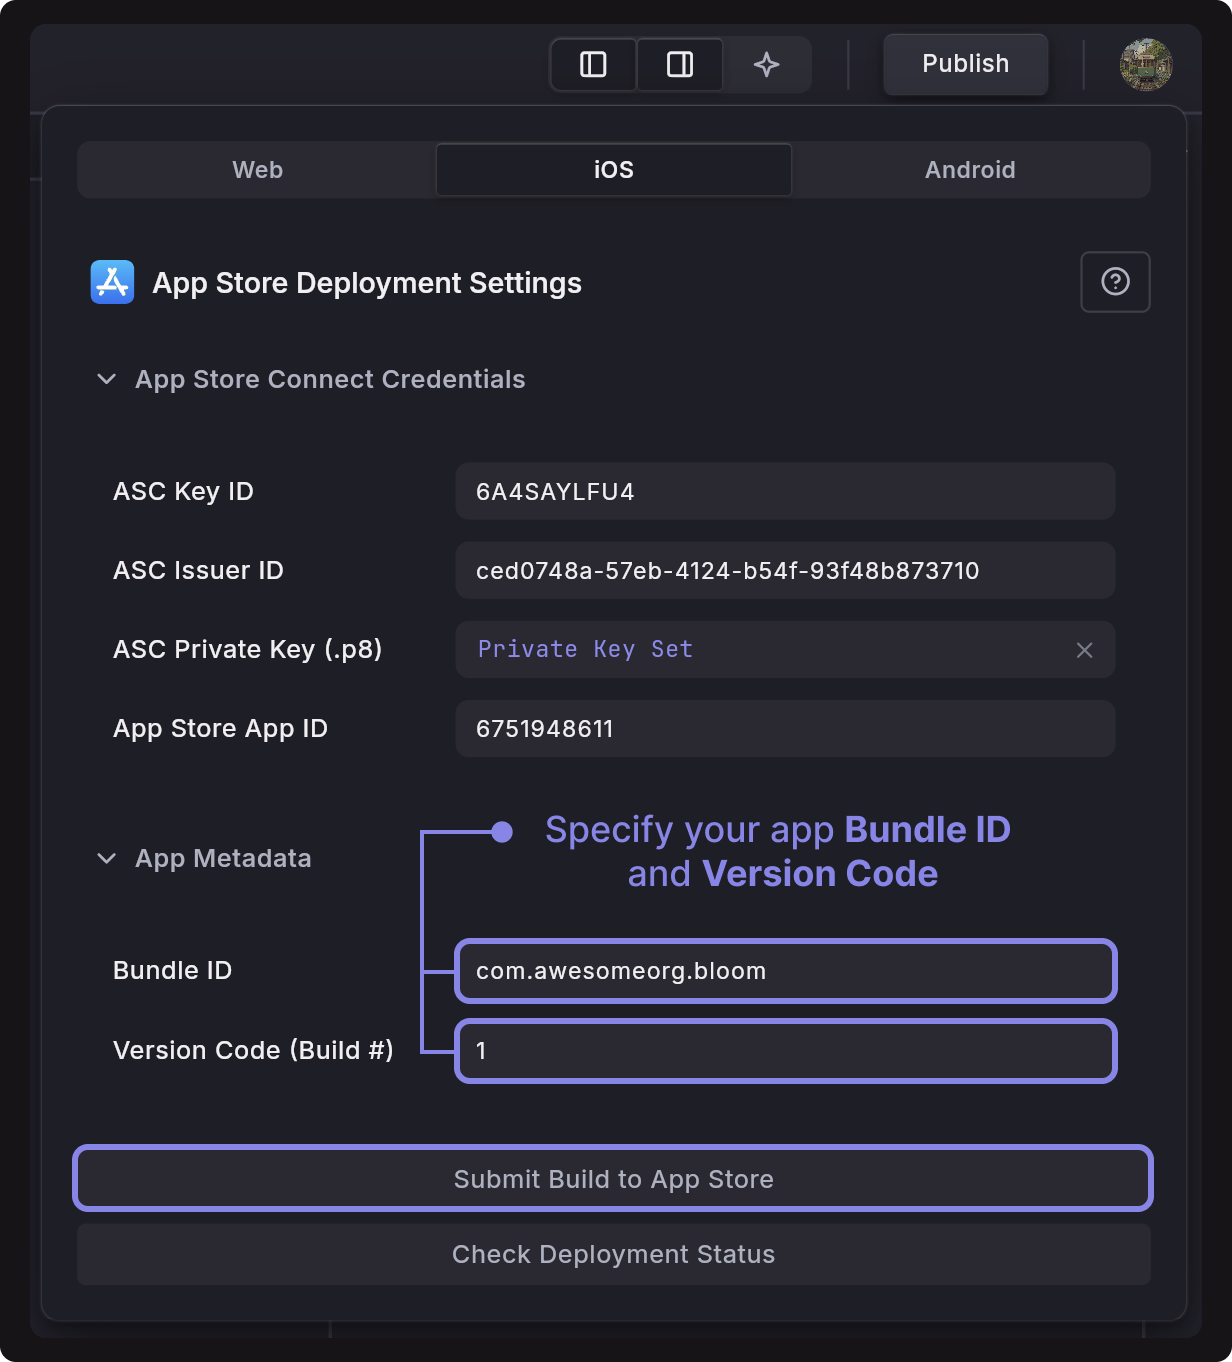
To deploy your app from Dreamflow, navigate to Publish > iOS, specify the Bundle ID and Version Code, and then click Submit Build to App Store.
Once deployed, you will receive an email from App Store Connect that a new build has been added to your app.
- If another deployment is already in progress, deploying a new build will cancel the previous one.
- It may take a few minutes for the request to process. Once completed, the status will be updated to Submitted.
8. Submit your app for App Store approval
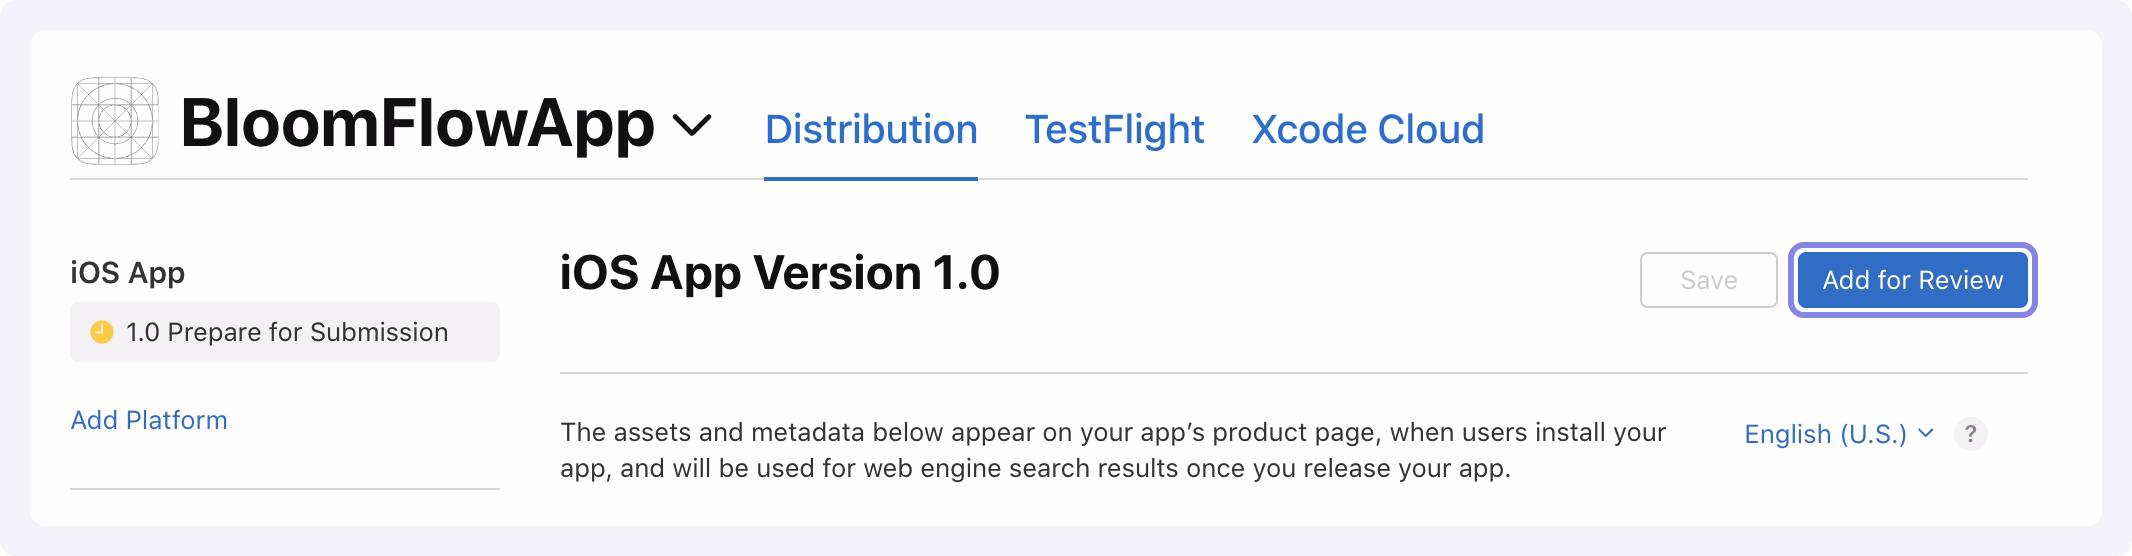
From App Store Connect, select My Apps and choose your app. Select Prepare for Submission, add the app assets and metadata, and then click Add for Review.
Your app will now be reviewed by Apple. For additional information on Apple's review guidelines, please see this link.
FAQs
Invalid App Store Icon. The App Store Icon in the asset catalog in 'Runner.app' can't be transparent nor contain an alpha channel.
You need to update your App Launcher Icon (under Settings & Integrations --> General) with an image that isn't transparent and/or doesn't contain an alpha channel.