Google Play Store Deployment
Dreamflow allows you to deploy your apps directly to the Google Play Store from within the platform. This guide covers all the necessary prerequisites, a step-by-step deployment process, and common troubleshooting tips.
- Ensure you have set an app launcher icon.
- Register for a Google Play Developer account.
- Ensure your app package name is correct, as it cannot be changed after deployment. To verify it, open
android/app/build.gradleand check theapplicationId. To update the package name, you can use the change_app_package_name package or simply ask the AI agent. - It's recommended to test your app on a real device before deployment.
1. Creating app on Google Play Store
To create a new app in the Google Play Store, start by opening the Google Play Console and clicking the Create app button. Enter the App name, select the app type, and choose whether the app will be Free or Paid. After that, accept the Declarations, and finally click Create app to proceed.
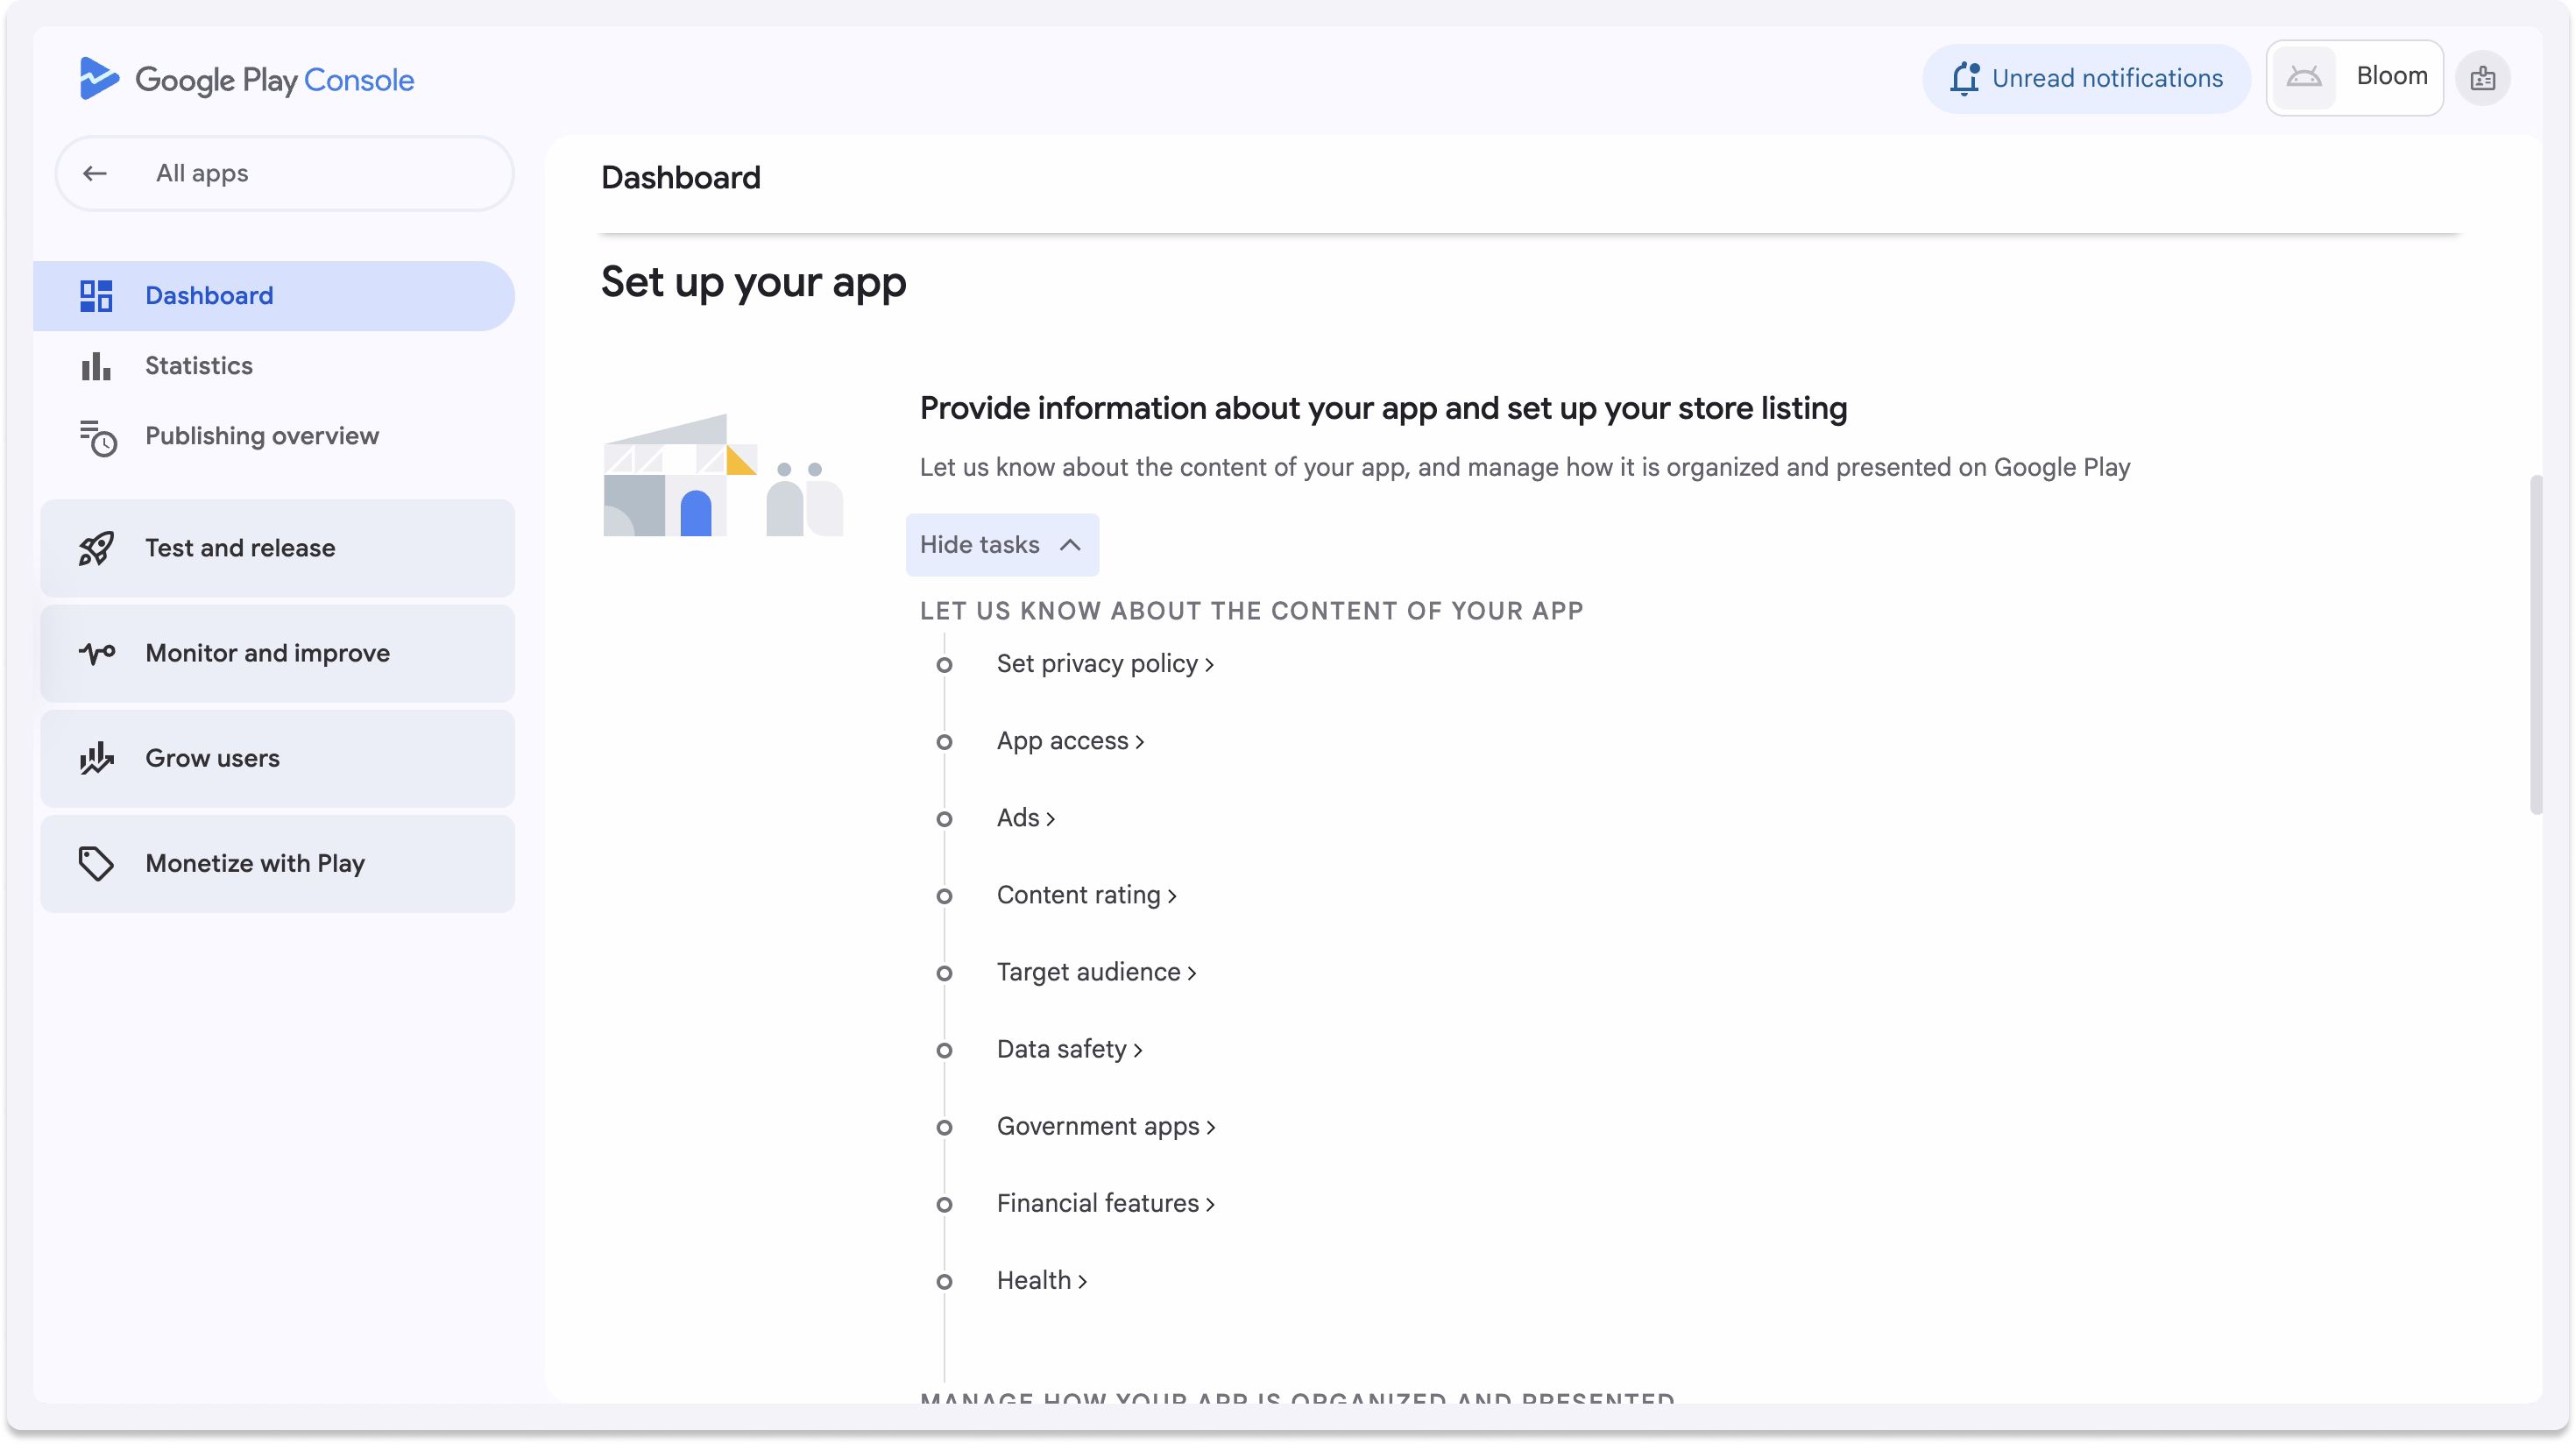
2. Set up your app
To provide the app details required by the Google Play Store, go to the Set up your app section within your newly created app. Expand the View tasks list, then click on each task and complete the required information step by step.
3. Adding service account credentials
To enable Dreamflow to deploy your app to the Google Play Store, you need to add service account credentials.
3.1 Creating a Service Account
To create the Service Account, you can follow the instructions from here. To help you get started quickly, here are the exact steps you need to follow:
-
If you haven't set up Firebase in your app, you'll need to create a Google Cloud Project.
-
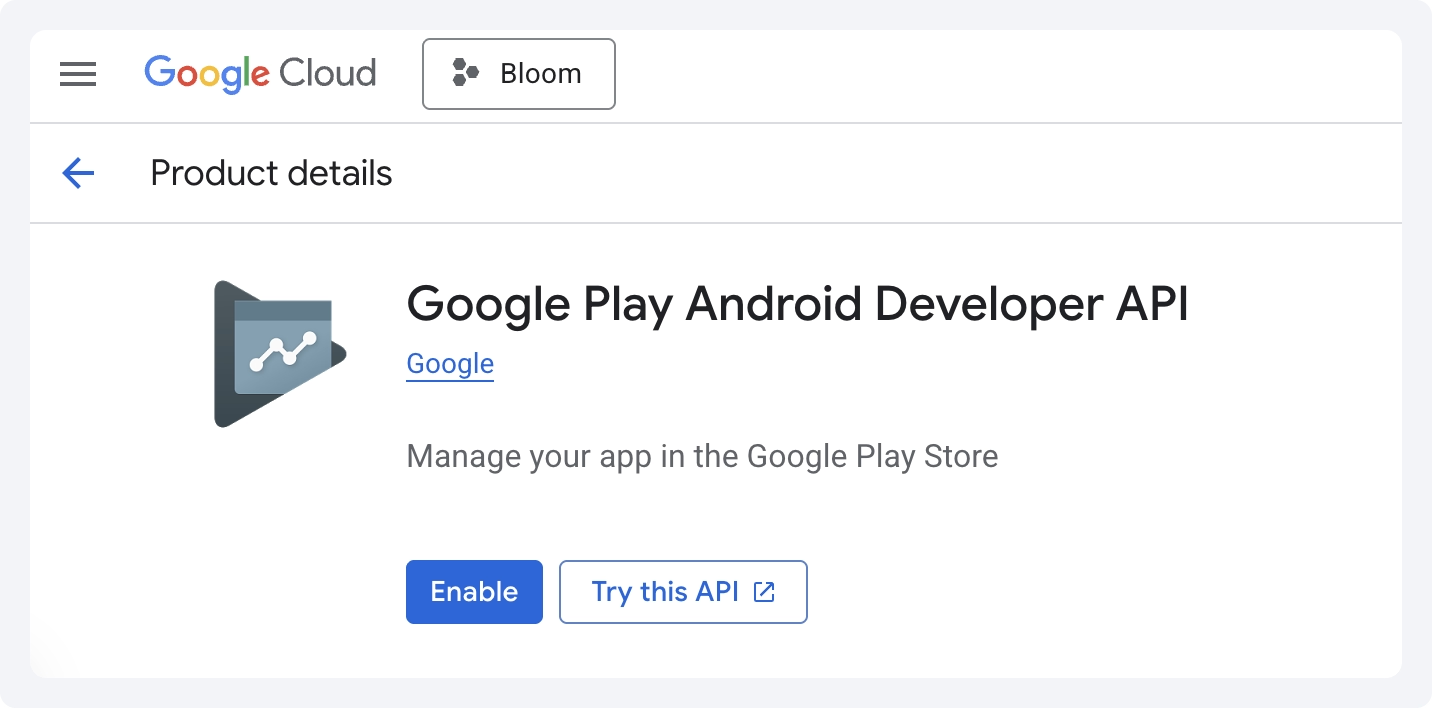
Then, head over to the Google Play Developer API page in Google Cloud Console and click Enable.
-
In Google Cloud Console, go to Service Accounts, click + CREATE SERVICE ACCOUNT, and follow the steps as shown below.
-
Now, download the JSON key file by clicking ADD Key > Create new key > select JSON > CREATE. Keep this file secure.
-
In Google Play Console, go to Users & Permissions, click Invite new users, and add your service account email with these permissions:
- "Edit and delete draft apps"
- "Release to production..."
- "Release apps to testing tracks"
- "Manage testing tracks and edit tester lists"
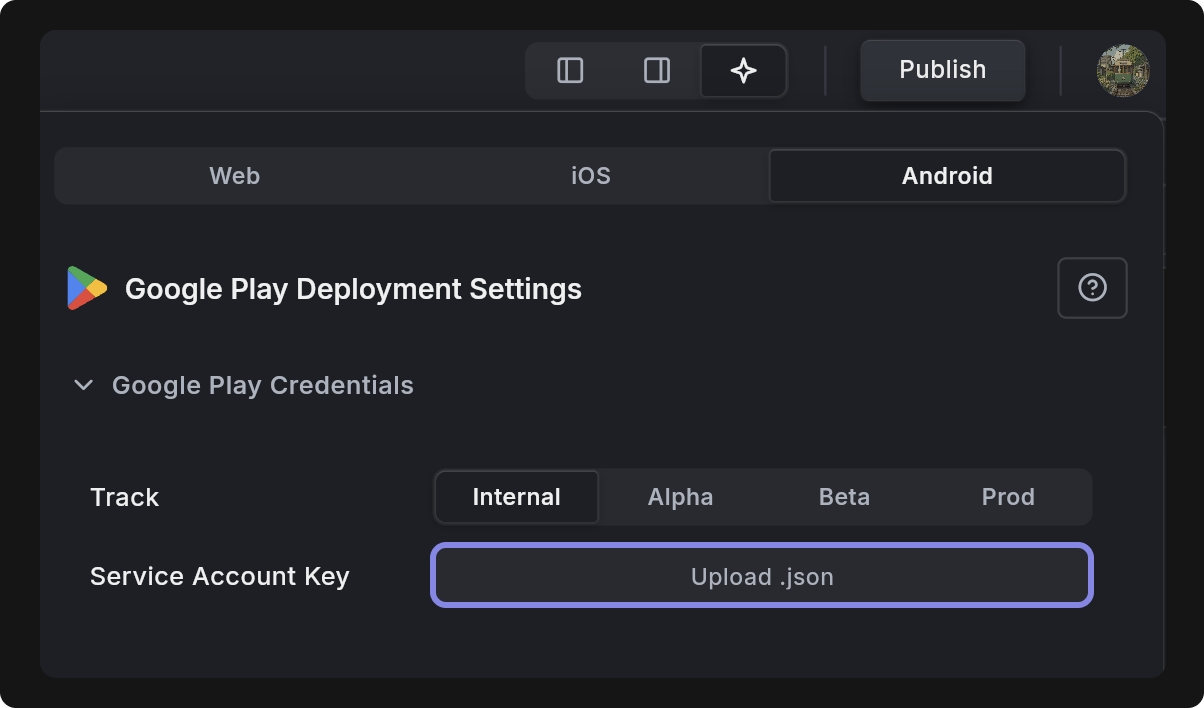
3.2 Uploading service account credentials to Dreamflow
To upload your service account credentials in Dreamflow, go to Publish > Android. Under Google Play Credentials, click Upload .json and select the .json file you downloaded in step 4.
4. Deploy to Google Play Store
For first-time deployment, you need to create an initial release manually in Google Play Console. After that, Dreamflow can handle all subsequent deployments.
4.1 Downloading AAB file
In Dreamflow, set the Google Play Track to Internal, enter the Bundle ID and Version Code, then click Submit Build to Google Play. Wait a few minutes and click Check Deployment Status.
Once the build is complete, click Download AAB File button (in the App Bundle section). If the button is still disabled, wait a bit longer and try again.
Sometimes the Download AAB File button is disabled because the build has failed. Review and fix the build errors (you can use Fix with AI), then resubmit the build. The AAB download will be available once the build succeeds.
4.2 Upload AAB file to Internal testing track
In Google Play Console, create an Internal Testing track and upload the .aab file.
After the internal testing track is set up, Dreamflow can handle all future deployments directly.
4.3 Deploy from Dreamflow
To deploy your app from Dreamflow, navigate to Publish > Android, set the Track to Internal, and update the version code. If your app is still in draft mode (not yet available on the Play Store), set Submit as Draft (under Deployment Flags) to True, and then click Deploy to Play Store.
- If another deployment is already in progress, deploying a new build will cancel the previous one.
- It may take a few minutes for the request to process. Once completed, you will get a pop-up saying Your app is being deployed to Google Play.
4.4 Verify deployment
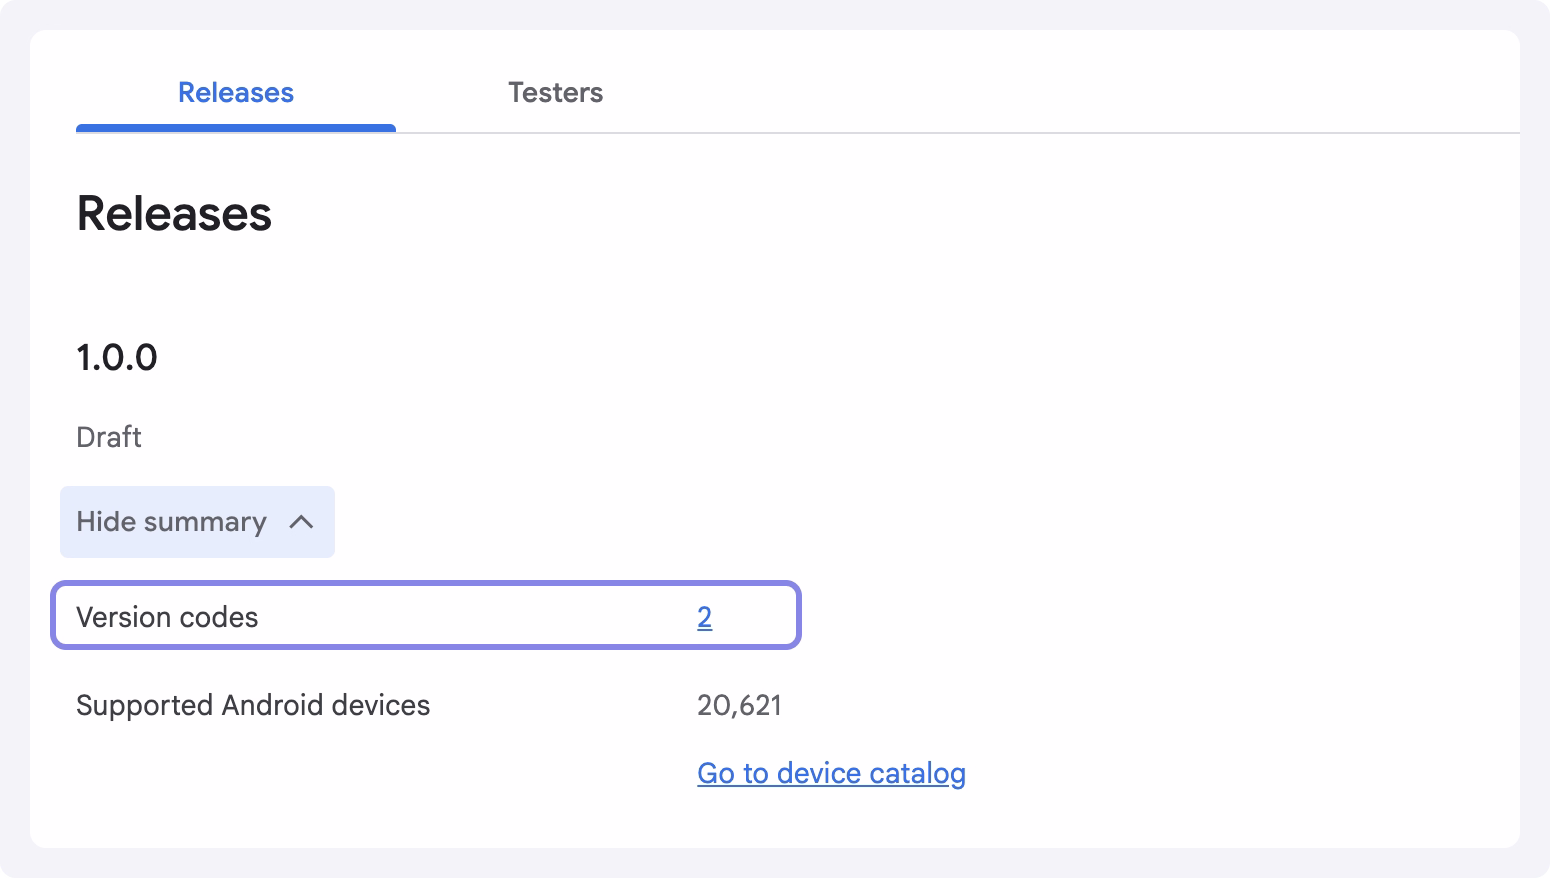
To verify that the app is deployed to Play Console:
- Open the Internal testing in Google Play Console.
- Under the Releases section, find your release and click on the Show Summary button.
- See the Version Codes number is increased.
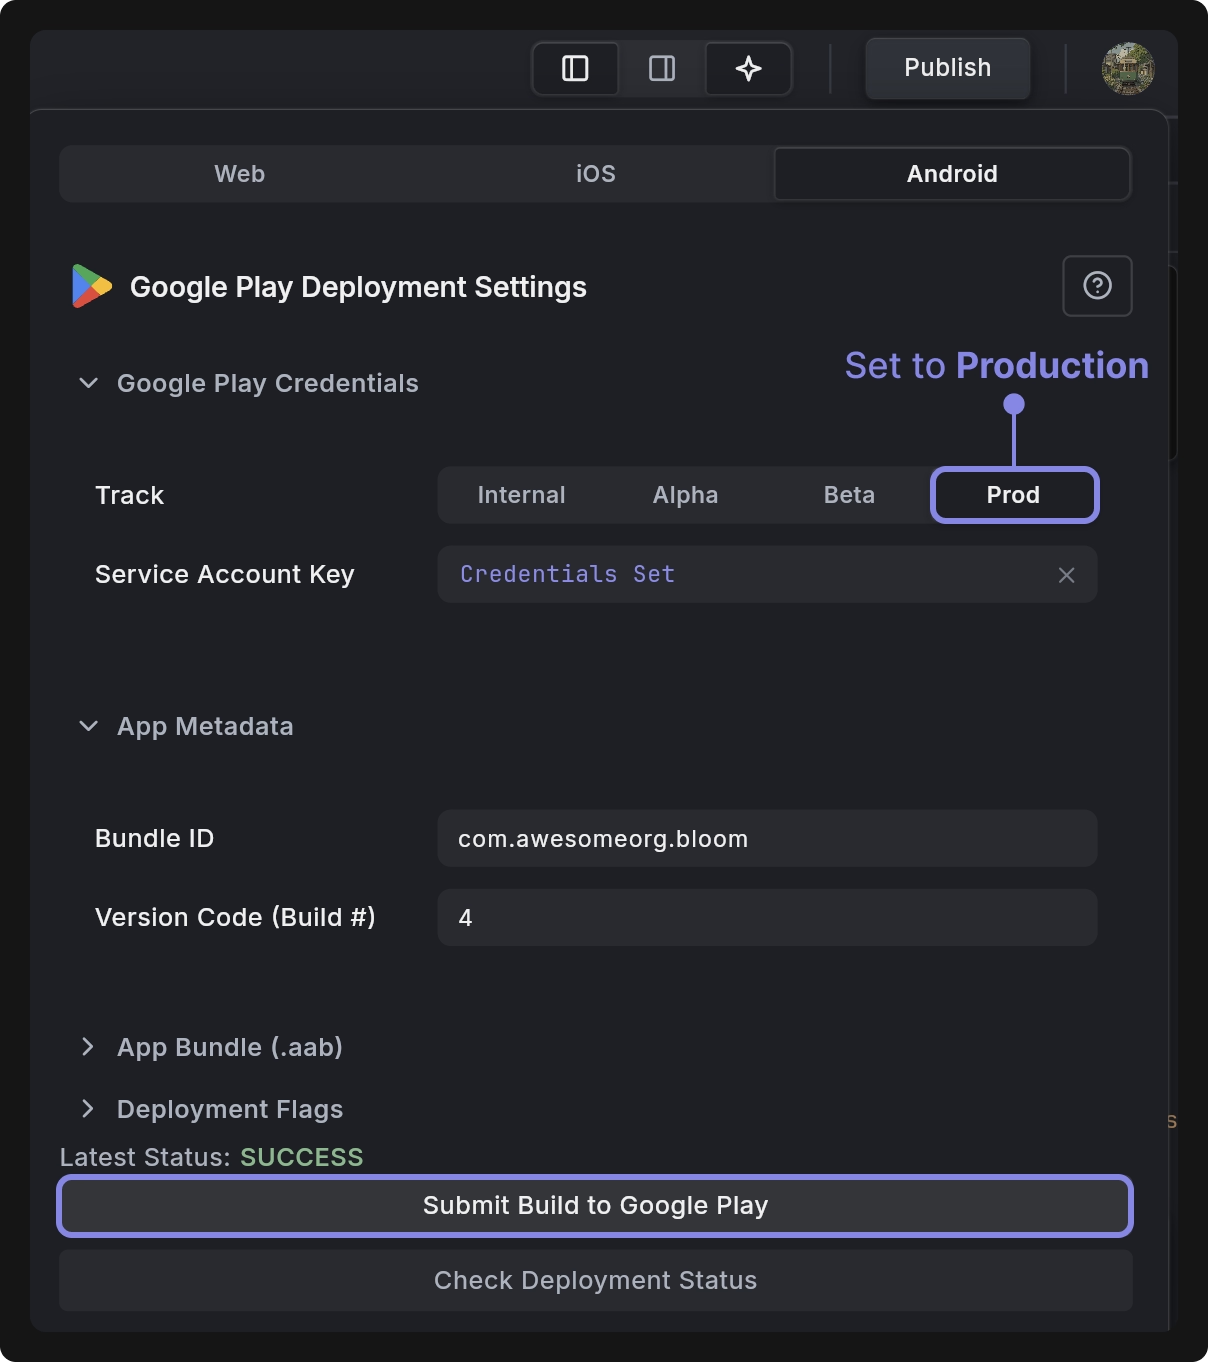
4.5 Deploy to production
To promote your app to production, open your Internal testing track in Google Play Console and complete the release. Once the internal release is finalized, click Promote Release > Production.
For all future deployments, set the Google Play Track to Prod in Dreamflow and deploy directly from there.
Deployment Flags
Submit as draft
While deploying, if your app is still in draft mode, meaning it is not available on the Play Store yet, you may encounter an error message stating, 'Only releases with the status draft may be created on a draft app.'
To resolve this, enable this option, and you'll see that the release will be created as a draft. You'll then need to manually roll out the app.
Changes not sent for review
If you face an error that says 'Changes cannot be sent for review automatically', enable this option and retry deployment.
FAQs
Why am I getting an "Invalid Package Name" error?
This happens when your package name already exists or doesn’t meet validation requirements. Make sure your package name is unique and not already used by another app on Google Play Store. Note that the package name cannot be changed after deployment.
What should I do if I see "The service account does not have permission to perform this action"?
This means your service account doesn’t have the correct permissions. In Google Play Console, ensure the account has these permissions:
- Edit and delete draft apps
- Release to production...
- Release apps to testing tracks
- Manage testing tracks and edit tester lists
Why does my first upload fail with a message like "You need to use a different package name"?
For the initial deployment, you must manually download the .aab file and upload it to internal testing track in Google Play Console. Once the initial track is set up, Dreamflow will handle all subsequent deployments automatically.